12.30.2010
A blast from the past from Samantha on...
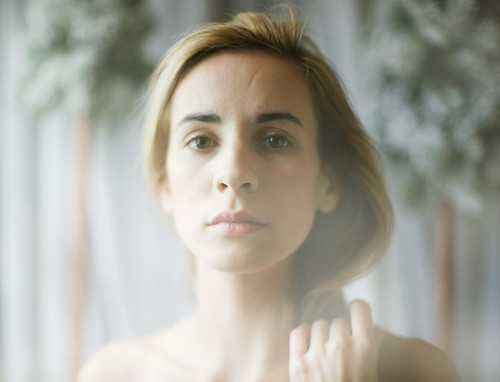
I'm a day late...(and definitely a dollar short!)...but here is this weeks hump day happiness to get you through the week from my daughter's flickrstream...
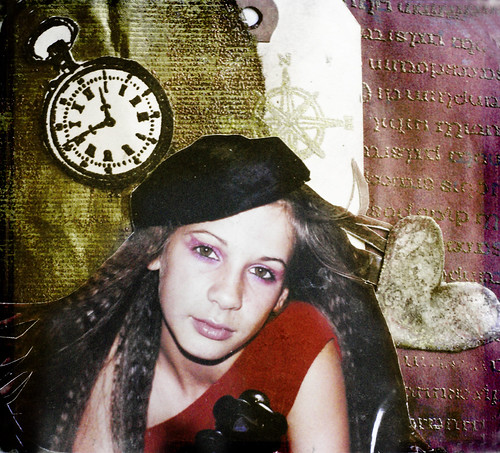
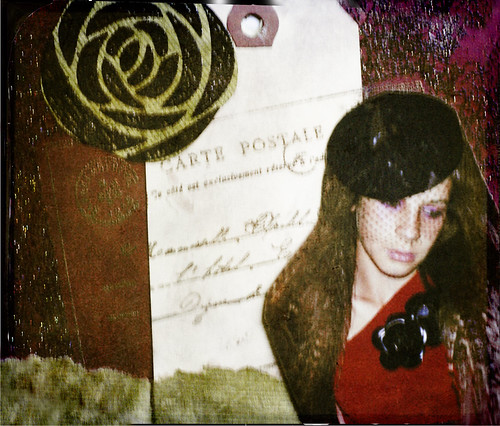
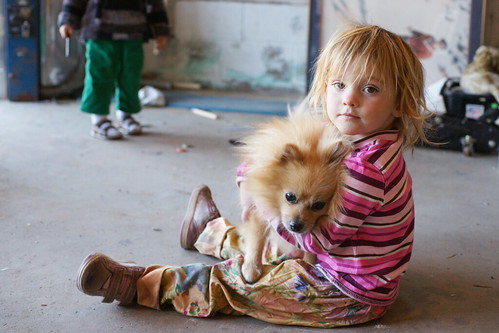
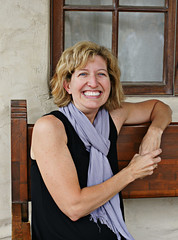
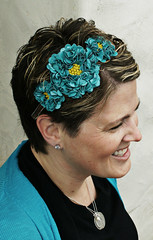
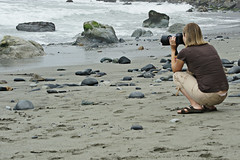
Her most current and personal photograph brought me back to a photoshoot she created with her sister years ago. Samantha is very serious about her photography but her modeling days go way back. Who knew that an afternoon of rainy day fun would lead to her career behind the camera? (...or her creativity with self portraits.)
12.27.2010
...so 2010 was a year of learning important stuff!
I finally learned how to use my camera manually! This was a huge step for me. I am embarassed to say that I took a weeklong photography workshop in Aspen, Colorado 31 years ago where I learned how to use my SLR manually as well as how to develop black and white film. Those lessons were forgotten over the years as my camera gathered dust because it was either diapers or developing film...4 kids later, the diapers always came first.
I feel like I am starting my creative life all over, overcoming some of life's big obstacles so that now I can focus on my photography along with my family. I used the beginning of 2010 to research equipment, techniques, start my blog and joined some fun groups. One of the groups I joined was Clickin' Moms where I could learn and ask questions of other mom photographers, although I love flickr...the alpha male photographers could get a little overbearing in the discussion groups. I took a paid workshop called "Rock Your Camera 101" for 4 weeks and I learned so much about using my camera manually!
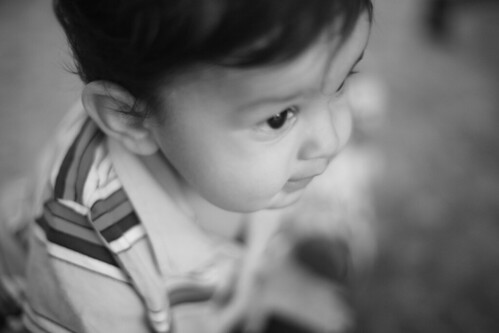
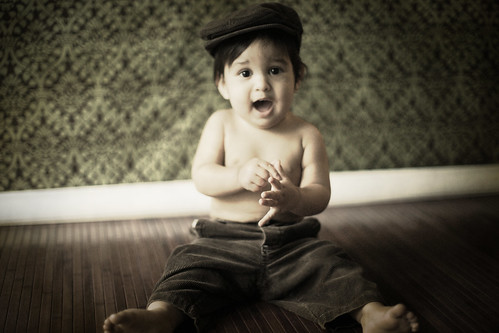
I learned a great technique for black and white conversions that I love! I was researching how to create sepia images but the technique works even better for black and white. I think it is an old way of refining black and white images from film days. Here is the link for the tutorial, I have had lots of fun playing around with it...the image I have posted of my grandson uses this technique.
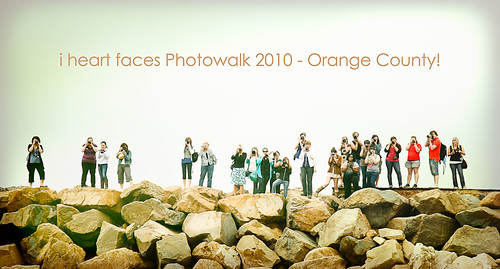
Another fun group I joined was Iheartfaces. They have challenges every week with different themes. It gives me something to work on regularly to improve my skills. I also joined the group for a fun Photo Walk (along with a close friend) at the Dana Point Harbour in Southern California. I was the old lady of the group but most of the young women were helpful and supportive. I learned about using a loupe that hangs around your neck to look at my screen in the back of my camera to quickly preview my images. That has been very helpful. They also have a group you can join where you can ask questions, post images and find support.
There you have it, the biggest things I have learned and all summed up in the image I have posted...there have been so many other little things. I am determined to keep up with my blogging and share them with you (did you notice the redesign?). I look forward to portfolio building in the next few months and setting up my studio along with my talented daughter. I hope you join me along the way and share your ideas, links and photography with me as well. We can all learn from each other!
12.27.2010
I have added links to my free copyrighted textures for you to use! Please use them as you please, just don't redistribute them...it would be a bonus if you shared your creations under the texture images and gave vintagedesignsmith credit. :)
Learn from some others in the Iheart faces group...
12.22.2010
A little something from Samantha I call...
Inspired by the many bloggers who weekly share a little something to brighten your day, I am going to give you a little happy on Wednesdays featuring the work of my talented little pup...Samantha Smith. She recently did an engagement shoot for a friend as part of her portfolio building and she did an amazing job. I was her styist, grunt labourer and scarf waver.
learn photography baby maternity textures how to
b.
12.20.2010
soooooooo excited for this new texture set!
You will be too and you MUST get them and use them...but not yet. I have posted my love for textures in still lifes and composite images. But they are also wonderful to add dimension to portraits as well as to brighten the colors, darken the edges and create a mood.
I just downloaded the lastest offering from one of my favorite blogs http://www.thecoffeeshopblog.com It is an amazing FREE set of textures that Rita is generously sharing with her blog readers. It is the set I have been meaning to make and haven't (lots of time and work there!). I also love that they are called these wonderful, yummy "Baking with Mom" names like "favorite apron", "pie pan", "old whisk" and my favorite (at least right now and it's not just the name)..."foamy chocolate milk". It makes me happy to play with these just like baking with mom would have if she could cook.
Here is a photograph I took of my grandson who just passed his 1 year old milestone SOOC (straight out of the camera)...

Here is the "foamy chocolate milk texture"
Now here is the image with the texture pasted on an overlay layer in Photoshop...that's all.
If you just desaturate the color in the original image somewhat, you get this...
This one I cropped and turned into black and white using grayscale...I was going to do my usual tritone processing but the texture overlay brightened up the areas I would have in tritone perfectly.
I also like my images to tell a story (less scrapbooking that way). I took a snapshot of our "Meet the Family" dinner to introduce my sister's new boyfriend (she became a widow last year so this is a big deal). I just did the "spray and pray" method of taking pictures while everyone is eating because no one would look at me, you would think that they hadn't eaten in years (well, the food was amazing...I'll have to blog the recipes)... When people are eating they make all kinds of goofy faces and it makes for interesting photographs. I chose this one because it really shows the family dynamics. The guy is nervous and looking around not knowing what to do, my sister is looking at him twitterpated and the rest of us don't really care, he's a nice guy and we'll see how it goes. The point of the texture in this image is help tell the story by brightening up the key players and emphasize the family laissez faire attitude by darkening around the edges. I think it does that quite well. I think I used another texture but I have forgotten already (what with my rambling on)... I also had to play with the color a little because I forgot to set the white balance in the camera and the color was a little too yellow.
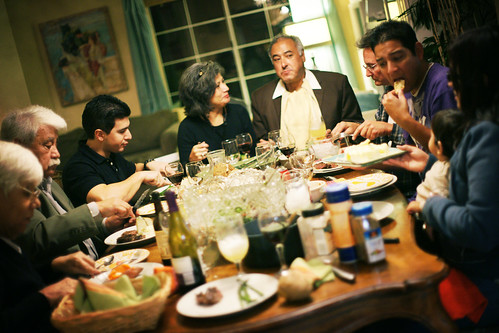
By the way, who really knows what anyone is thinking...but doesn't the texture help with what's imagined? So now it's time to get yourself over to this page on The Coffeeshop Blog to get your own FREE set of "Baking with Mom" Ethereal Textures.
12.27.2010
I have added links to my free copyrighted textures for you to use! Please use them as you please, just don't redistribute them...it would be a bonus if you shared your creations under the texture images and gave vintagedesignsmith credit. :)
12.07.2010
...so the self portrait is required for "le artiste"
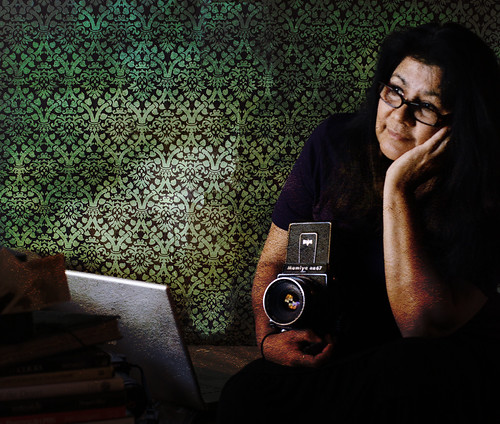
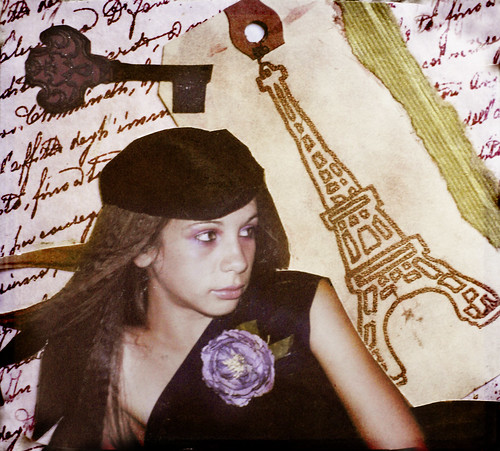
...and how can I be take seriously as a fine portrait photographer of I won't even take a photo of myself right? I've been meaning to do this and then I read in a blog about how photographers don't often take self portraits... http://blog.heygirlniceshot.com/2010/11/the photographer has no shoes In her blog she mentions a contest you can enter WITH PRIZES on another site, go4pro! Then lo and behold, my favorite site for photography challenges had the theme of self portraits for this week. http://www.iheartfaces.com Well, I figured I better get to work. I needed inspiration for just the right shot (you know, one that would minimize my over the hill, er, um...faded beauty and wisdom of advancing years).
I did a search for "older woman self portrait". That was scary! First of all mostly self portraits of pretty young things came up, did NOT do much for the ego. Then there were the smattering of older people self portraits...NAKED! ugh, I thought I was going to lose my lunch. I don't know what kind of statement these people are making but seriously, try it with clothes on! Thankfully, images of paintings, artist self portraits came up in the search and I found those the most inspiring. I like the idea of the feel of a classic painter's self portrait, usually kind of dark and shadowy with light coming in through a window and the usual tools of an artist at hand. I like the feeling of musty age that textures add to a photography so I added one to my portrait (click on the photo for the credits). What do you think?
Don't forget to check out Iheartfaces.com to see more self portraits...click on the button below!
11.01.2010
...so I am learning how to use my camera manually and life got in the way.
I decided to take an online workshop called Rock Your Camera 101 through clickinmoms.com to learn the basics of using my camera manually. The first week went great and then I overconfidently thought I could take my next lesson with me to my sister's as I helped her empty the home she is losing to foreclosure after her husbands death in February. BIG MISTAKE! Not only because I didn't pay attention that the lesson would be in 3 parts (and I only had the first part) but because I also was not prepared for the emotional and physical task helping my sister would be.
By the time I arrived back home the day my homework was due, I was overwhelmed and exhausted. I didn't realize what I had gotten myself into all the way around and my brain was on overload trying to catch up on my photography lesson. I just couldn't process any of it, I spent the next few days just trying to organize and sort my sister's old married life onto tables and counters for an estate sale. I read my lessons over and over including the new third weeks lesson hoping that something would sink in, trying to practice when I could. This is the most important thing I have ever wanted to learn and I was mad at myself for spending the money without thinking about my ridiculously difficult schedule this year. But somehow I am getting through it.
I took some time one morning to practice my lesson on grey cards while having coffee with my husband. I really didn't understand what I was doing, I still don't have the lesson clearly defined in my head as to what it all meant but it seems to have laid some groundwork for later lessons. Here is that practice.
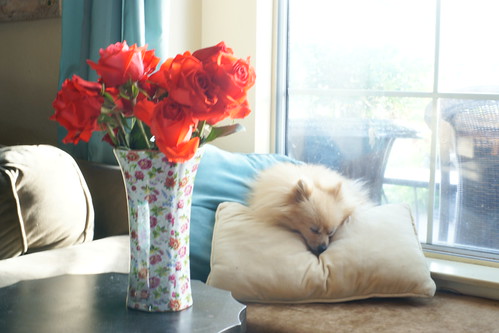
Not only am I trying to catch up with my husband but cats are trying to drink water from the vase and dogs are trying to get in the picture as well. I like this shot I got with one of the dogs, I was playing with focus which was hard with the very bright window and the big light drop off on the left.
The next morning, I didn't even have time for coffee...my homework is already massively late and I take a moment to play with my white balance buttons. This is important because whenever I take my camera inside someone's house, I notice the colors are always to yellow and I don't know how to fix that. This is one of the reasons I am taking this workshop. This is my attempt at the assignment and I still am not sure of what the heck I am doing.
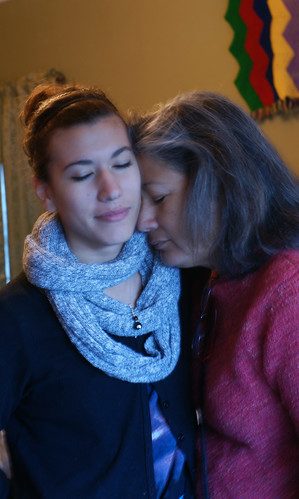
Now I have to get the actual homework done and the only people around me are my sister and her daughter who are overwhelmed with their life spread out all around them at the end of a very hard week. My niece encourages me and offers to model for me. She holds up the appropriate gray card I am learning to work with in a very poorly lit room about 10 feet from a window and the sun is going down fast. My sister steps in and I caught a very intense moment but it isn't until I drive down the mountain road on my way home that I realize I forgot to set the custom white balance properly so this won't qualify for my homework.
Now my homework is late, I have a whole new lesson to learn and my life is feeling a little out of control. I am an old mama dog who is not only past late homework excuses, my kids are too. But because I am an old mama dog, I put one foot in front of the other and just take care of what's important knowing that somehow everything will just fall into place.
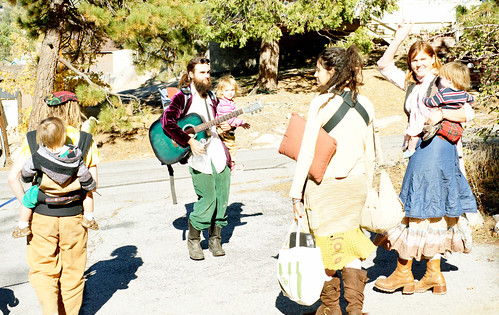
At the end of the estate sale, a wild crowd of gypsy hippies come along and one of them (Sunny) shares her emotions, her dreams and her children with me to photograph as they shop what's left of my sister's old life. They have no guile, I can shoot away while changing my settings, playing with my focus, clumsily trying to figure out what I am doing.
As I practice, I start to understand the lessons and I am so excited to finally get it, have that AHA moment. The photos aren't great, these people don't stand still but I understand how to get the light right.
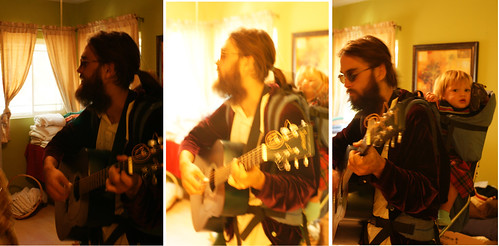
I guess my excitement was contagious because Sunny broke into song and nursed the baby at the same time) while Dylan continued to play his pretty green guitar. So as the kids wandered around, I practiced changing my settings including the custom white balance settings I had given the camera in the house.
My crazy 2 weeks ended in a crazy, colorful way. I came of age in the late 60's, early 70's when hippies were everywhere. It was never a lifestyle I was attracted to, I liked baths and security as well as fashion way too much. But I love art, creativity and openness in people. I realized as I listened to Sunny's romantic vision of the world, that my sister and I have already lived a lot of Sunny's dreams. Romantic vision means hard work and time, sometimes money. Things don't end up as romantic or appreciated as we hope and sometimes they are better. But our dreams once fulfilled or ended means that there needs to be new dreams, new adventures. That is why I am finally learning photography, it is an old dream I had given up on for lack of money when my kids were young. I guess inside I have a young hippy child with creative hopes and dreams although I still love baths and fashion! I have learned that security is something I can give myself and share with my family and that it is still important to me even with an itinerant life. I had so little emotional and physical security as a child, that insecurity has sometimes kept me from enjoying my dreams. I hope that little Willow and the other children in this group never have that in their lives.
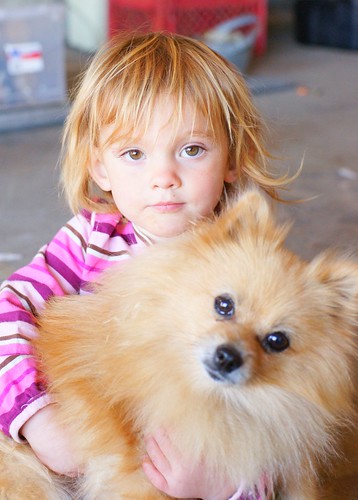
Many thanks Sunny, Dylan, Willow and the rest for helping me get my homework done!
10.26.2010
So it's another challenge on Iheartfaces...pink and props!
I love this photo of Isabella, she was so hungry and it was the first day her mommy had been gone for a little bit so when she got back she was in no mood for picture taking! But we were all excited to try the birds nest I had made of a smaller grapevine wreath supporting a larger wreath with some natural mosses, grasses and wildflowers woven in. There is a soft comfy round pillow in the middle under the blanket. The bird's nest prop makes this photo so perfect, her mood was like a baby bird that needed feeding NOW! She was quiet and fine as we were settling her in and trying to figure out how to pose her. Then she let loose and here she is, the delicate fragile beginnings of female life.
The challenge for this week includes pink to remind women to think about their breast health and breast cancer prevention. With all the public education and awareness month, marathons, mammograms, fundraisers,...the statistics for breast cancer has not improved. It is important that women educate themselves on their health and that we as women educate our daughters on how to live the best life possible to prevent cancer of all kinds...by our lifestyle, by our diet, by our choices.
I am now watching women my age who took birth control long term face breast cancer and other hormone driven cancers. Do you know the difference between a synthetic hormone and a natural one? Do you realize the profit in pharmacueticals for women and that drives a lot of our health care today? This is my photography blog, but it is Breast Cancer awareness month. Make choices so that you and the women in your life can live long enough to have many photographs taken.
My sister is an herbalist who works with holistic doctors in treating cancer patients to build their immune systems even while undergoing traditional cancer therapies. You might enjoy this article on preventing cancer... http://www.botanicawest.com/understanding-cancer-prevention-and-treatment-part-1/
7.21.2010
So I am trying to stretch my creativity and improve my artistic Photoshop skills...
Click on the image to see the credits to the artists of the textures used
There are some really artistic people on flickr who create amazing photo manipulations that don't look...well...manipulated. I admire the work as art I want to see, own and create as well. I have been entering challenges in texture groups on Flickr like this one and Ghostworks Not only am I learning but I am inspired by the textures available from the group which has inspired me to create my own textures you can see on my Flickr for you to use...these are some of my favorites:
One of my favorite artists is Jamie Heldon who creates imaginative, whimsical digital illustrations with Photoshop. Here are 2 samples of her work, she also has a website...J Heiden Photo You just have to look at her work, it is amazing! The picture I made above for a textures challenge was inspired by her work.
The first artist in this type of work that I saw on Flickr has a wonderful old masters painterly quality to her work. I wish I could show you a sample but it is not available to share so you will have to follow the link HERE Believe me when I tell you it is a must see!
Now because of her work I was introduced to another generous creative talent whose textures are used by many Photoshop artists...Jerry Jones. Once I saw his work, I saw that he was recommended by some of the bloggers I love like Rita at the Coffeeshop. He has some wonderful work of his own but his true talent is creating textures that he offers for FREE! for other people to use in their own works as well as tutorials on how to use them. You will be inspired by his website as well that also has other fun goodies you will want to learn and use! Find his website HERE
Here is one of his works that inspired one of mine for a Flickr texture group competition. I suppose I love doing these because I cannot paint without making a muddy mess or getting impatient and I can create these, print them on canvas or make greeting cards and other fun things with them.
The last image I created is of my daughter who always wanted to be a princess (especially after finding out that's what her name means)! Now I am thinking of illustrating a story for her baby about his mama wanting to be a princess but finding out that being a mother to a little prince is better.
Making these helps me learn skills to use on any kind of photo editing as well as stretches my imagination as well as seeing the world around me in a more creative way. I hope it affects my photography and the way I will take pictures. There are many more inspiring artists I hope to share with you in the future. Who and what hat inspires you?
6.29.2010
So this weeks challenge on Iheartfaces is pets.
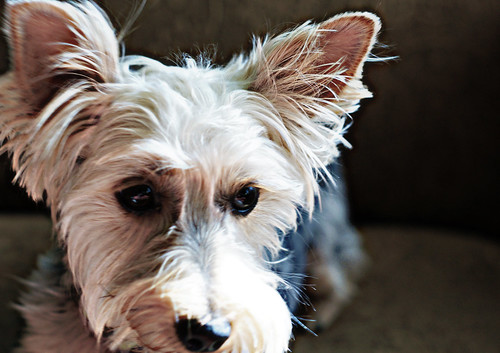
I don't know if you agree with me but I think that terrier's have old men faces so I wanted Osita's photo to look like an old chiarusco painting (like the paintings of the artist Caravaggio I once saw at the Smithsonian) with dark shadows and light shining on the face. Osita is backlit slightly by the late afternoon sun above and behind her with a reflector on my right side only on her face (not her body).
I would love to take this kind of portrait of an old man. It's hard to ask old men, they are so self conscious about their age and what they can't do anymore. I love them for the things they can do, like encouraging my children and loving them no matter what, for their stories, for loving their wives so dearly and for knowing how to do all kinds of things (today my dad told me how to make a baby bottle out of a coke bottle and a rubber glove...I lost all my grandpup's bottles and he was hungry!) In case you didn't notice, I tend to digress alot...Hey! Give me a break cuz' I'm an old mama dog!
See more cute pet photos from others trying out this challenge at Iheartfaces
Photography Terms to Learn from this Photo - Shallow Depth of Field (DOF)
Depth of Field or the acronym DOF is a description of how much of your photograph is in focus. A shallow depth of field simply means that one specific area of your photo is sharp while other elements are blurred. A great use of DOF is to single out your subject while at the same time reducing the effect of distracting background.
6.25.2010
So I like to use textures...
I love how textures can take a boring photo and give it dimension and interest. It's also an easy way to "scrapbook" a photo for giving away to the grandma's, aunties and friends. Today on I heart faces, it's Fix-It Friday where we can edit a photo they give us however we like to make it a better photo. It's so interesting to see how lots of people come up with different ways of editing. Of course, many people crop the photo...they may give it a totally different angle and play around with the color or make it black and white.
before editing
Because I knew I wanted to add a texture and lettering, I cropped it with those in mind. (I am using Photoshop CS4 by the way)...I always make a couple duplicate layers and those are the ones I change so I always have the original to work with. My daughter taught me a cool way to sharpen a photo and bring out the color, I just go to "filter" on a duplicate layer choose other/high pass usually set to around 30 and after that's done choose overlay/softlight/hardlight and decrease the opacity if needed. I add the texture by making it a layer (copy/paste from a texture image) and choosing the overlay/softlight/hardlight thing the same as the filter I just described. I then added the lettering. On this photo I wanted the backround color to be more intense so I made another layer and erased the boy out of the photo (which was easy because of the light halo around him). Then I just saturated the color and changed the hue a little. It took me 10 or 15 minutes to do and it's lots of fun.
I have a collection of textures on flickr you might like to try (I used one from the Guadalajara textures I made from a trip to Mexico) and you can see them here: Guadalajara Textures on flickr or another collection here: Fine Art Textures on Flickr Please feel free to download them and use them, I would just appreciate a credit for the texture and that they don't get posted online anywhere without the credit/link or offered for sale. You can learn alot about textures from a great blog by a very generous artist called Shadowhouse Creations and you can see his latest post from my blog list to the left. It's also great fun to see the artistic efforts people create by posting them under the texture that gets used. I've learned much seeing how others see things differently just like I am learning with this Fix-It Friday challenge that you can view here.
Here are a few photos I have posted on flickr with textures, sometimes I am inspired by old faded postcards and photos, sometimes a style of painting or art medium and it's fun to play around with. Have you used textures?
6.24.2010
So I went on this Iheartfaces photowalk...
I really like the Iheartfaces blog and everything they offer to improve my photography so when they announced their first Photowalk across America...it sounded like fun and I wanted to go. I wanted to meet some of the people behind the photography I'd seen on Iheartfaces AND an added bonus was an outing to Dana Point Harbor. One of my first dates with my husband was a restaurant called "The Jolly Roger" overlooking the harbour...sigh, good memories. I hadn't been that way in years since I moved inland to the country. I signed up and my friend Trish who loves photography more than I do (without telling her - SUPRISE!)
Trish and ME!
taken by Amy Nguyen, click on the image to see her flickr photostream!
Although we had been on flickr photowalks (the guys mostly ignored us) before, we were looking forward to this one hoping we could learn a few things and meet some supportive photographers in all ranges of ability. There was a group leader (professional photographder Susan Keller) but she had to leave early for a wedding shoot. That was a little disappointing but "we go with the flow where ever we go". She starts us off with the opportunity for headshots of each other since we often don't photograph ourselves and it was a good idea for our personal blogging profiles.
the group leader, angry julie who has a cute blog & unknown
http://angryjuliemonday.com/
Then we headed off to a jetty to take a group photo and any shots we wanted on the way.
http://angryjuliemonday.com/
Then we headed off to a jetty to take a group photo and any shots we wanted on the way.
Right off the bat we met a couple of young moms that were like a version of us 20 years ago (except they knew way more about photography than we did). I feel bad I could not remember both their names...one was Sharon and she gave us pointers on manual settings, her friend had this cool loupe around her neck that fit over the lcd screen and enlarged the view of the photos taken. We LOVED that and must have one! She sent me the link to buy it here... bhphotovideo.com Another photographer had a white balance ring for over the lens hanging around her neck, she said it really helped and was easy to use. It seemed handy to have helpful tools hanging around your neck but I would need a personal instructor hanging there too and that might be a little much.
Sharon and Shannon (after looking at almost 5000 photowalk images...figured out her name)
Sharon's beautiful photo was taken by Shannon Flores, click on the photo to see more.
I had a hard time leaving the beach. It was so peaceful and beautiful but this was a PhotoWALK not a PhotoSitonyerbuttatthebeach. I love the photos I got there. By this time the crowd was headed through the dock area to the lunch restaurant. We were straggling in back with Sharon and Shannon having a good old time. By the time we got there the group leader was long gone, there were only a few people left and the lunch was ...meh. Actually my lunch was terrible but the manager came out and replaced it with a pound of unbelievably flavorful just out of the smoker smoked salmon to take home. I wish it wasn't a 2 hour drive to go back and get some more! After lunch those cutiepies Sharon and Shannon gave us more tips and then we said goodbye.
Trish and I walked around a took a few shots of interesting things and people on the way back to the car and ate a wonderful lunch she packed of fresh spring greens with poached fish and greek yoghurt with fresh blueberries.
On the way back to the car a woman was searching the trash for recyclables. I am always still moved by the resourcefulness of those with less to provide for themselves in such a well to do area. If I was in a really bad predicament, would I be humble enough to do such work? Hmm
Over all it was worth the 4 hours of driving we did that day to go. There is another photowalk hosted by Scott Kelby in July. I might try that one even with all the real professionals and "dudes" that will be attending...Will you be going? Did you go on this one? Link your blog in the comments!
photo by the group leader, Susan Keller (a REAL and talented professional)...click to see this and her other photos on flickr
Check out my blogs on pretty places, things, people at:
http://thevintageeclecticlife.blogspot.com/
and recipes
http://vintagerecipesmith.blogspot.com
Check out my blogs on pretty places, things, people at:
http://thevintageeclecticlife.blogspot.com/
and recipes
http://vintagerecipesmith.blogspot.com
Subscribe to:
Posts (Atom)